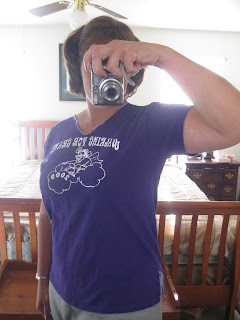
I used my serger for the whole project. It took less than an hour from start to finish! If you don't have a serger, you can use your sewing machine instead. For knits, a ball-point needle and polyester thread is best (I just use all-purpose thread, though). I would recommend a medium length zig-zag or decorative stitch, since it will have some give with the knit fabric. Knits won't unravel, so you have the freedom to use whichever stitch you like best. For a great little girls T-shirt refashion, visit this tutorial from Make It and Love It. It gave me the inspiration to try this one.
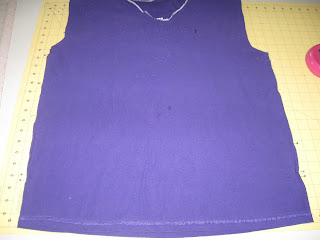
Here's the beginning and finished pictures:
Let's get started! First you need to de-construct your t-shirt. Start by cutting off the sleeves along the old seam. Next, trim down your side seams. I cut 1 1/2" off each side and 1" off the shoulder seam. From the sleeve, I cut 1" off the bottom and 1 1/2" off the old armhole seam. If you want a v-neck or larger neckline, cut this off the front panel of your shirt now. This is what your deconstructed T looks like after trimming:


You now have a front and back panel and two sleeves. Make sure your new sleeve will fit into your new armhole. I made mine smaller, so I had to move the armhole cutout up on the new front & back panels to fit the smaller sleeve. A little confusing if you're a new sewer, but just try it until it fits :)
Now we start re-constructing! Place your front and back panels with right sides together, matching up along shoulder seams. Sew across your shoulder seam. (I don't have a picture for this step)
Now is the time to finish your neck seam. I just serged around the opening. If you want a neck binding, the tutorial above has great step-by-step instructions for adding a binding using your extra fabric strips.
(My picture shows an open shoulder seam- yours should be sewn together now)

Next up is your side seam. Match up your front and back panels right sides together . I wanted a side flap at the bottom, so I measured up 3" and marked with pins. Finish these edges before sewing down the side seam. Pin and sew down your side seam.


Almost done! Next is time to add on your sleeves. This is the hardest part, but you can do it!
Start by sewing the underarm seam. Match your sleeves to their armholes - pieces should all be wrong-side out. Now, take a sleeve and turn it right-side out. Slide it into its armhole and pin around the opening. The right side of the sleeve and body are now together.

Sew around your arm sleeves and voila - you're done!
Another way to do the sleeves is to fit them before sewing your side seams. The tutorial from Make It & Love It above does it this way.
I'd love to see pictures of your finished re-fitted T's! Hope this was helpful and please ask if you have questions. This is my first tutorial I'm happy to help if a step is unclear. Happy sewing!


2 comments:
The shirt makeover looks great. I haven't tried this but will after seeing your success.
thanks for taking us step by step. Really helpful.
Post a Comment